Navigating the Messaging dashboard
To work with the Messaging dashboard:
-
Go to Marketing in the left pane and select Messaging.
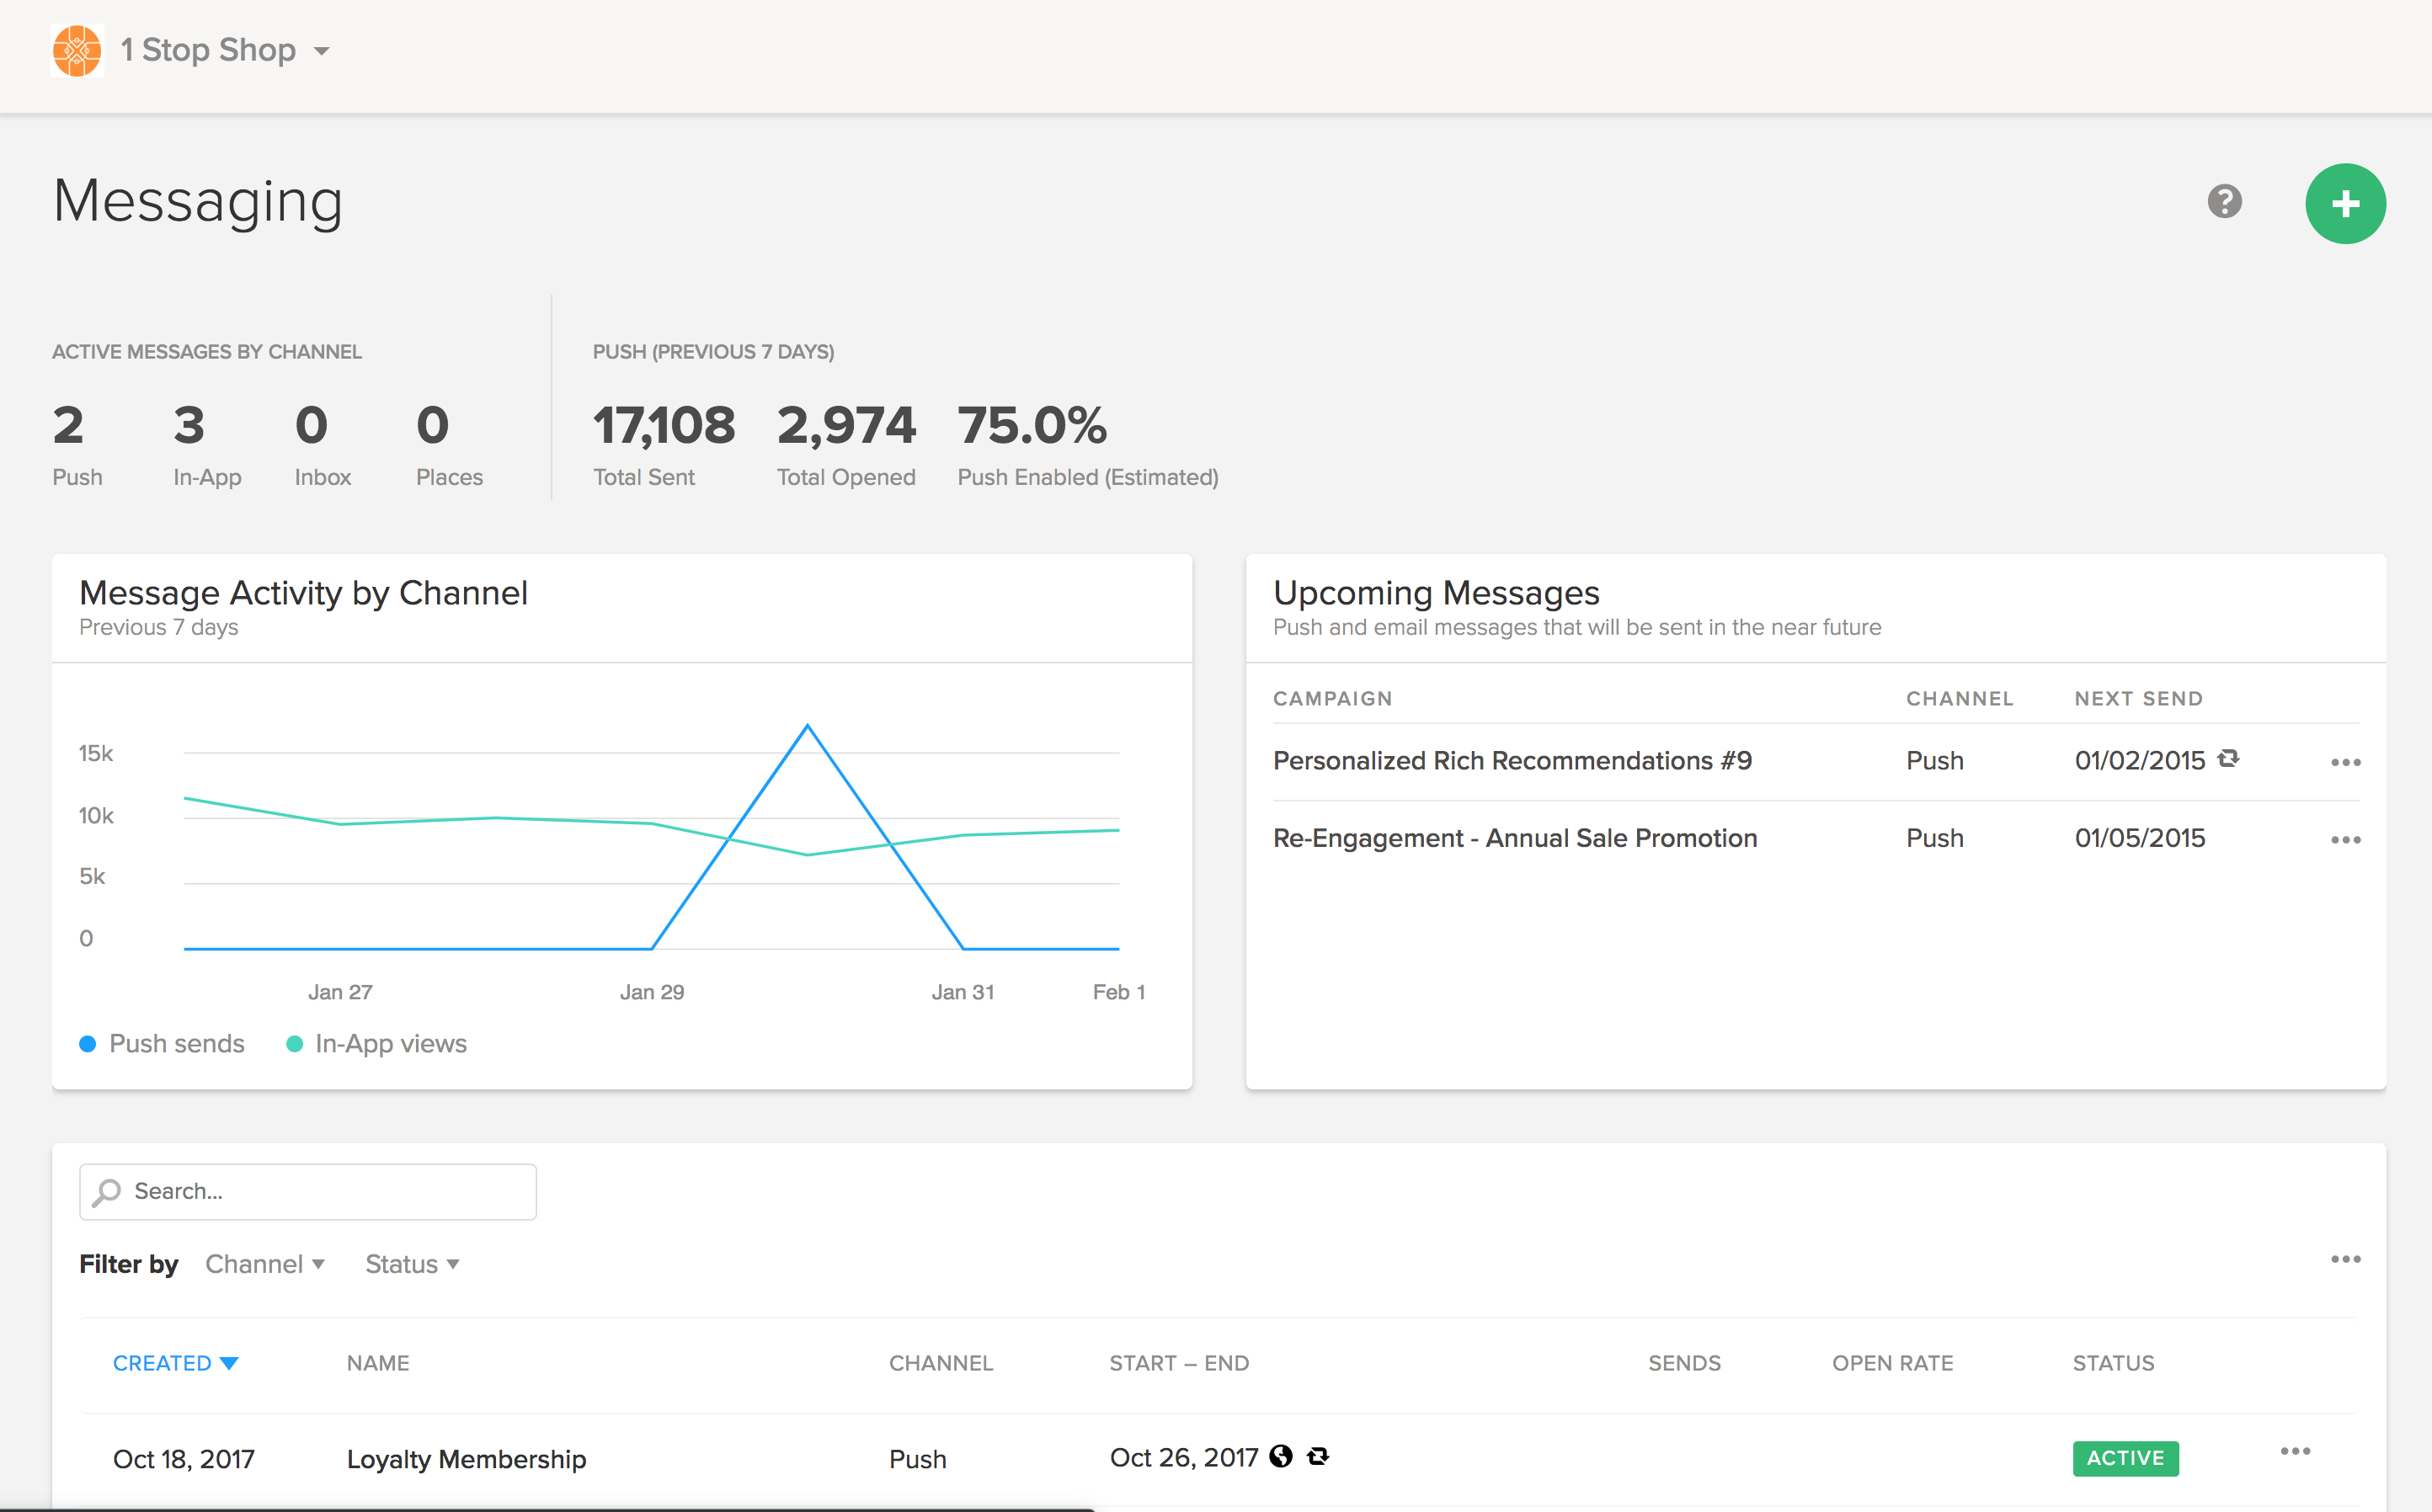
The name of the current app displays in the upper-left corner.
Note: If you are working with push messaging across Android and iOS apps, the
 (Android) and
  (iOS) icons display to the left of the app selector and the app names are listed on the right.
 - To switch to a different app, select the app name at the top of the page and then select one or two apps (one Android and one iOS) from the drop-down list. When you are done, select Apply.
The Messaging dashboard contains the following reports for the current app:
- Active campaigns by channel
- Push (previous 7 days)
- Message activity by channel
- Upcoming messages
- All messages
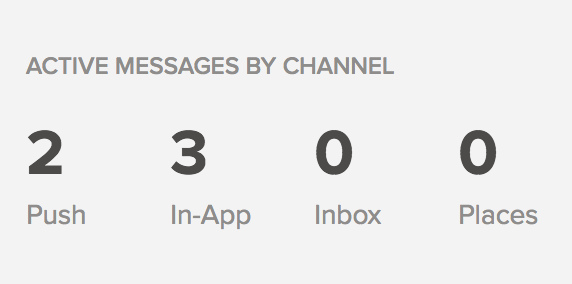
Active campaigns by channel
At the top of the Messaging dashboard, you'll see how many active campaigns you have running, displayed by their separate channels.
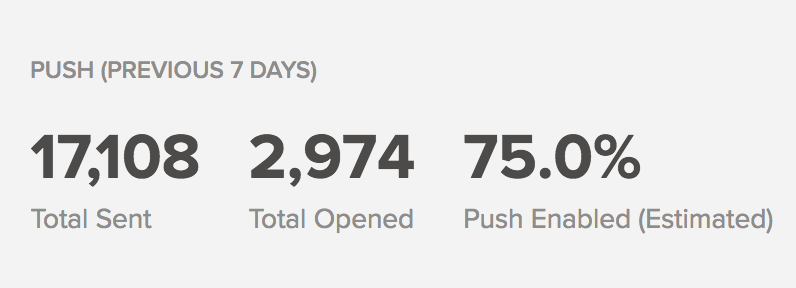
Push (previous 7 days)
You'll also see the total number of push messages you’ve sent in the last 7 days, the total number of opens, and an estimate of the total percentage of your users who have push enabled.
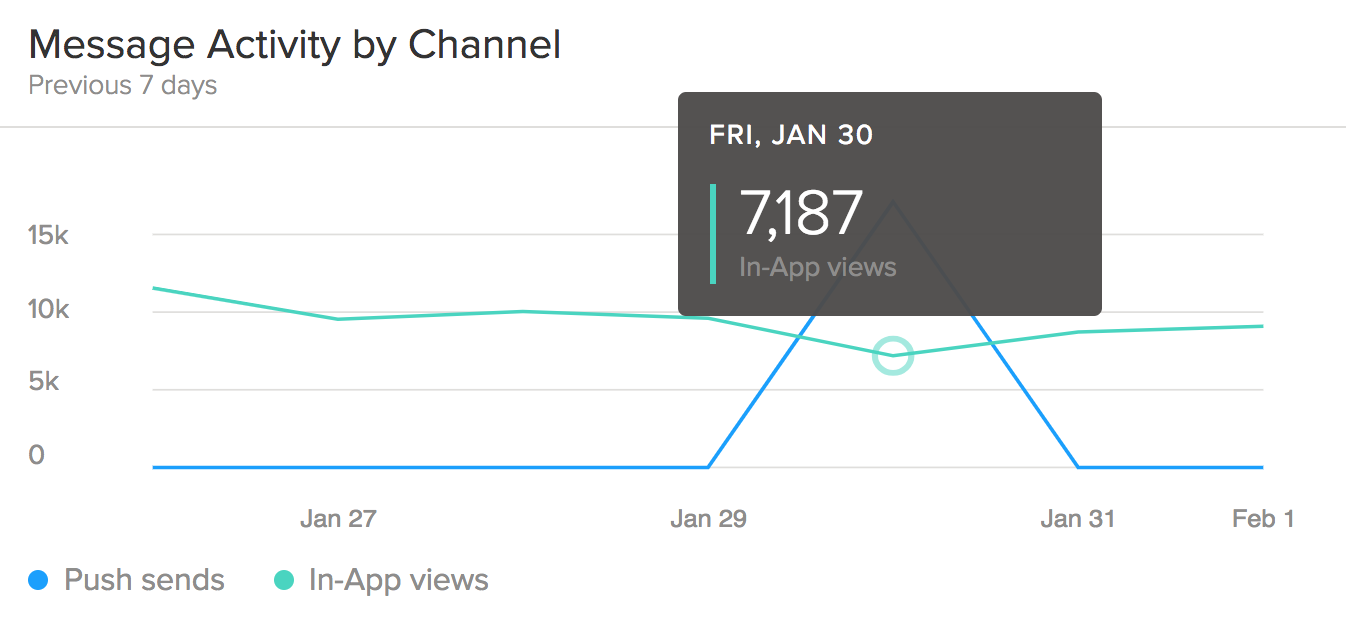
Message activity by channel
The Message Activity by Channel report shows data for the previous 7 days.
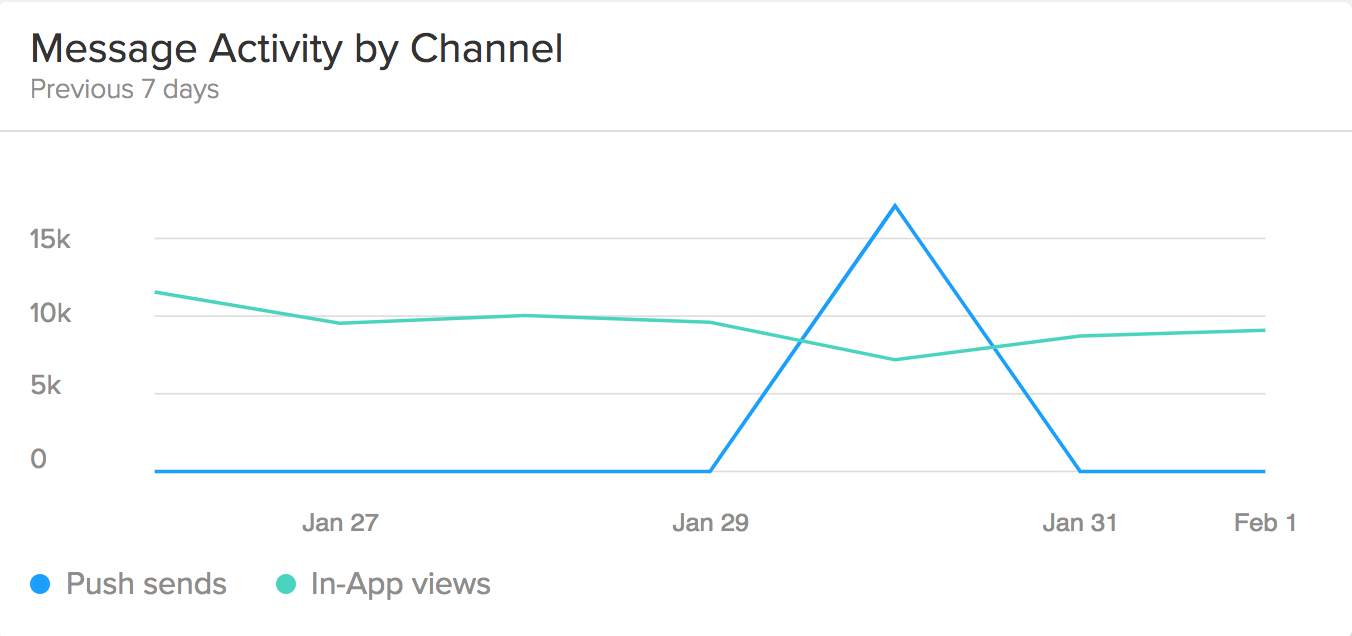
Point to a place in any of the lines in the graph to see the total number of sends or views on the corresponding day. You can also point to the key at the bottom to isolate a single line of data.
Upcoming messages
The Upcoming Messages table highlights the upcoming push messages, including the campaign name, the channel (push), and the next send.

In the Next Send column:
- A recurring (circular arrow) icon indicates that the message is part of a recurring campaign.
- A globe icon indicates that the message will be released in the user’s local time zone.
To work with a message, select the ellipsis (...) at the end of the row, and then select an action from the list:
- Select Performance to check the metrics for the message so far.
- Select Edit to make changes to the message.
All messages
The Messaging Dashboard also contains a table listing all of your messages.
-
Select a column head to sort the table by the column:
Name
Meaning
Created
When the message was originally created.
Name
The name of the message.
Channel
The type of message: push, in-app, inbox, places.
Cross-App This column is added to the table if you are working with push messaging across Android and iOS apps. A check mark indicates a cross-app campaign. Start - End
The start and end dates of the campaign.
OS This column is added to the table if you are working with push messaging across Android and iOS apps. The  (Android) and
  ( iOS) icons indicate the operating system type for the campaign.
Sends
Total number of messages sent. For cross-app push campaigns, the total number of messages sent for both operating system types.
Open Rate
Percentage of users who opened the message. For cross-app push campaigns, the percentage of users who opened the message for both operating system types.
Status
Status of the campaign: scheduled, draft, active, inactive, expired, sent, error.
-
To save the data in the table to a CSV file, select the ellipsis (...) in the upper-right corner of the table, and then select Export to CSV.
-
To locate a message:
- Enter the name in the search bar.
-
Specify one or more filters to narrow the results by channel, status, or schedule setting. For both channel and status you can select more than one option.
-
To work with a message, select the ellipsis (...) at the end of the row, and then select an available option:
Option Description Performance Display metrics for an Active, Expired, Inactive, Scheduled, or Sent campaign. For cross-app campaigns, select
 Performance or
  Performance to review metrics for each app separately.
Edit Make changes to a message.
Note: You cannot make changes to an Active campaign, but you can edit a Scheduled campaign that has not begun sending messages.
Tip: To cancel a Scheduled campaign and change its status to Inactive, select Edit, navigate to the Confirm page, and then select Deactivate.
Duplicate Make a copy of a campaign.
Select an app from the drop-down list, or for cross-app campaigns, select an Android app and an iOS app. Enter a name for the new campaign, and then select Confirm.
The new campaign is added to the Messaging table.
Archive Hide a campaign from the Messaging table.
Tip: To display an archived campaign, select the ellipsis (...) in the upper-right corner of the table, and then select the Show archived check box.
 Archived appears next to archived campaigns. Locate the campaign to display, and then select Unarchive from the menu at the end of the row.
Delete Delete a Draft or Test campaign. Select Delete again to confirm.
Note: You cannot delete an Active, Expired, Inactive, Scheduled, or Sent campaign.
Next up, it's time to build a messaging campaign. Your first step in any messaging campaign is to set a messaging goal.